
Introduction
You have just unrolled a fresh spool of premium lighting for your new ceiling cove or plaster-in profile project, only to find the strip is a foot too long for the channel. It is a classic frustration: one wrong snip can break the electrical circuit, leaving you with dead zones and wasted materials. The flexibility of LED strips is their greatest asset, but it also introduces a critical question: where to cut LED strip lights without destroying the entire system?
Unlike traditional incandescent rope lights, modern LED circuit boards are precision-engineered components. One incorrect cut can sever the series loop, rendering sections of your lighting useless. This guide provides a deep dive into the mechanics of cutting LED strips, handling various voltages and waterproof ratings, and ensuring every customized segment lights up perfectly.
For those ready to explore premium lighting solutions, visit the Darkless LED Home page to see what is possible with professional-grade equipment.
1. Where to Cut LED Strip Lights to Ensure They Still Work?
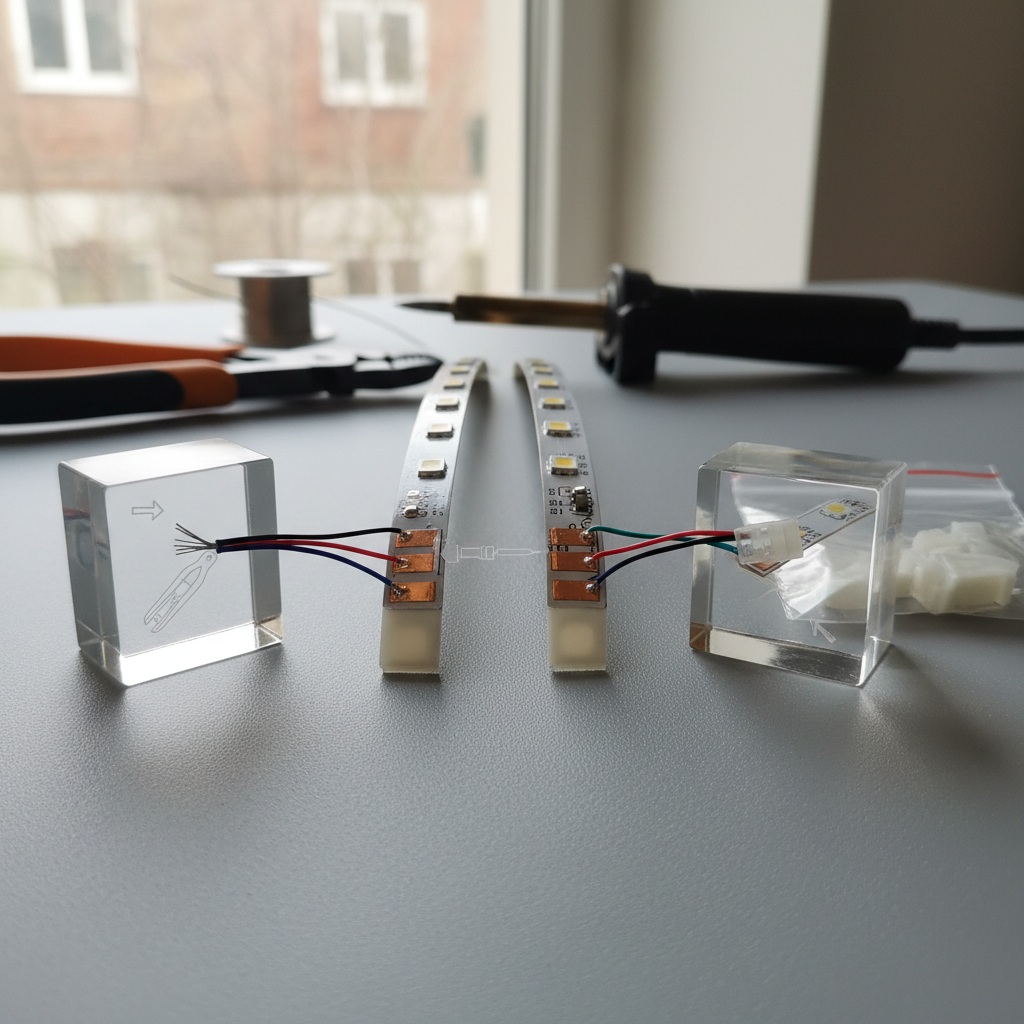
The most fundamental rule of LED customization is identifying the “safe zones.” LED strips are not continuous wires; they are a series of independent circuits laid out end-to-end.
Understanding the Copper Pads and Scissor Icons
If you look closely at the surface of the strip, you will notice a repeating pattern. Every few inches, there is a transverse line cutting across a set of oval copper pads. Often, this line is accompanied by a small printed scissor icon. These copper pads are the electrical “handshake” points between the independent circuit loops.
The Anatomy of an LED Circuit Loop
Why can you only cut here? LED strips are wired in “series-parallel.” This means that a group of LEDs (usually 3 or 6) creates a closed loop with resistors to manage the current.
- Inside the Loop: If you cut between the LEDs inside a loop, the electricity has nowhere to go. The circuit opens, and that specific section goes dark.
- Between the Loops: The copper pads represent the end of one loop and the start of the next. Cutting precisely down the center of these pads leaves enough conductive metal on both sides to attach a connector or solder a wire later.
Why Cutting Between the Pads is Critical
Precision is key. When you are learning where to cut LED strip lights, aiming for the exact center of the copper oval is vital. If you cut too far to the left or right, you remove the contact point for the next connection, rendering that end difficult or impossible to reuse without advanced soldering skills.
2. Where to Cut LED Strip Lights Based on Voltage (12V vs 24V)?
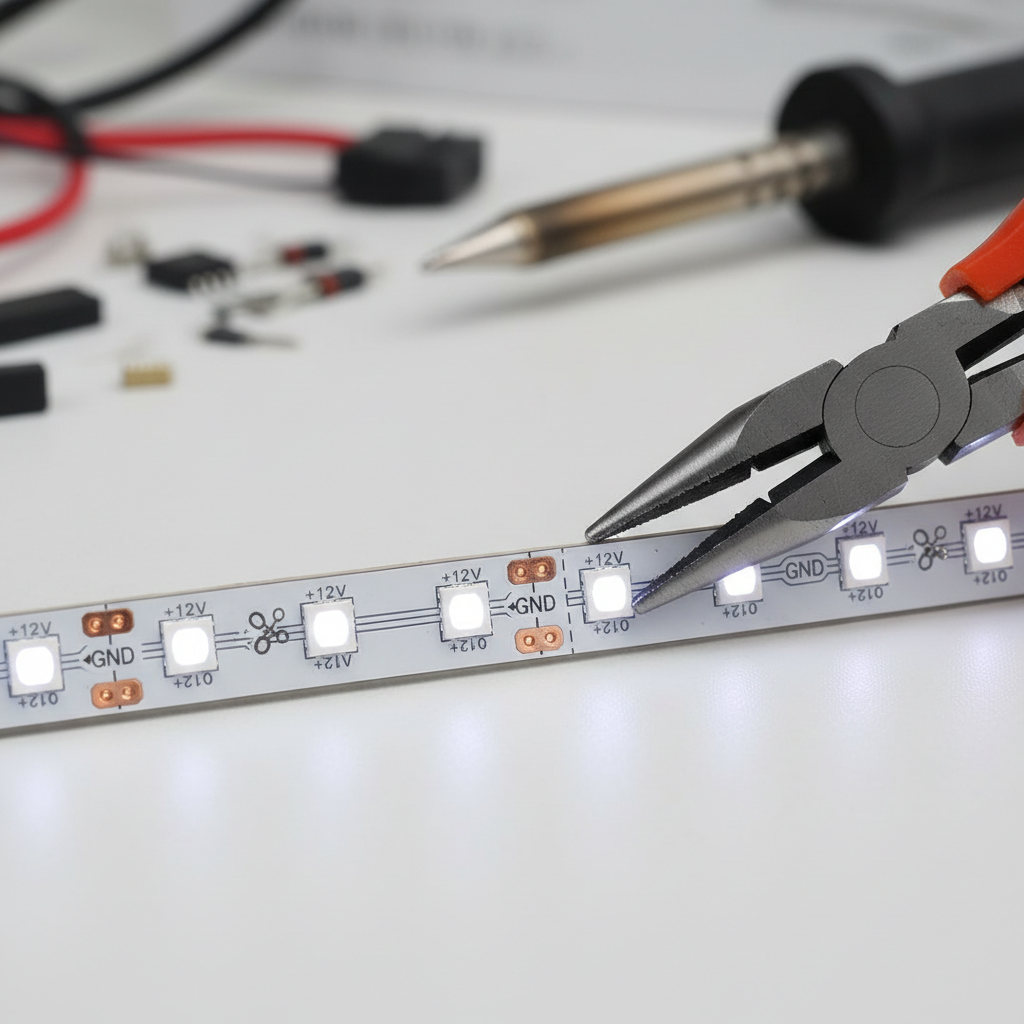
The voltage of your LED strip dictates the length of the circuit loops, which directly impacts how often you can make a cut. This is a crucial distinction for installers planning precise lengths for shelving or intricate designs.
Cutting Intervals for 12V Strips
On a standard 12-volt strip, the circuit loop typically consists of 3 LEDs. This usually results in a cut point every 2 inches (approx. 5 cm). This shorter interval makes 12V strips ideal for projects requiring high precision, such as PC case mods or tight automotive interiors.
Cutting Intervals for 24V Strips
24-volt strips are designed for longer runs to minimize voltage drop, but this comes with a trade-off in cut frequency. These circuits usually contain 6 LEDs per loop, pushing the cut points to every 4 inches (approx. 10 cm) or more. If you are installing under-cabinet lighting and need the strip to end exactly at the edge, a 24V strip might leave you with a few inches of dead space or overhang if not planned correctly.
Dealing with High-Voltage Options
When working with flexible LED rope lights , the rules change further. High-voltage (110V/220V) strips often have cut points spaced 20 to 40 inches apart. Cutting these anywhere else can be dangerous due to the higher current.
| Voltage | LEDs per Cut | Approx. Interval | Best Application | |
|---|---|---|---|---|
| 12V | 3 LEDs | ~2 inches (5cm) | Precision, Small Spaces | |
| 24V | 6 LEDs | ~4 inches (10cm) | Long Runs, Ceiling Coves | |
| 110V | Varies | ~20-40 inches | Outdoor, Architectural |
3. Where to Cut LED Strip Lights with RGB or RGBW Color Channels?
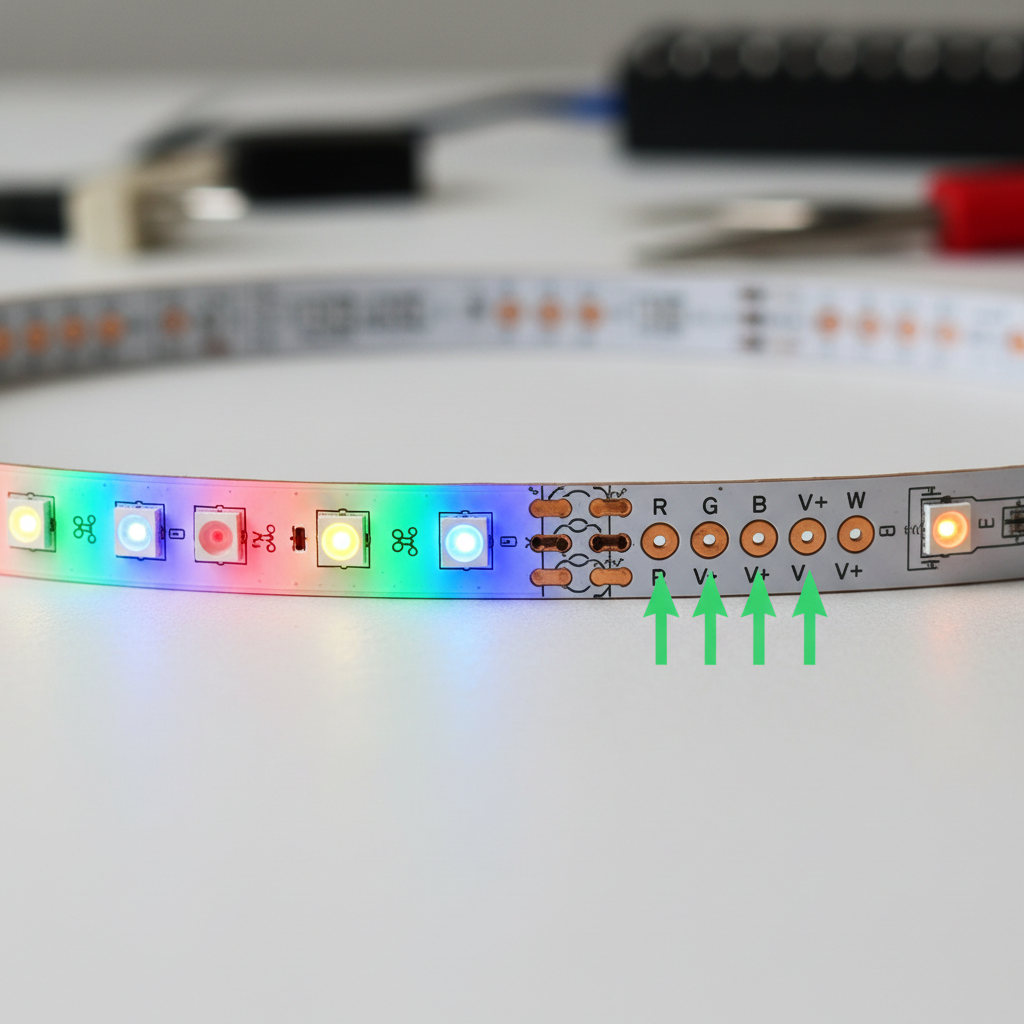
Multi-color strips add complexity to the cutting process because they utilize multiple channels to control color mixing. You are not just cutting a positive and negative line; you are severing four or five distinct data paths.
Identifying the 4-Pin (RGB) Cut Zones
Standard RGB strips have four copper pads at every cut point: +12V/24V, R (Red), G (Green), and B (Blue). When identifying where to cut LED strip sections for RGB, ensure your cut line passes cleanly through all four pads. An uneven cut might sever the Blue channel while leaving the Red intact, resulting in incorrect color mixing on the next connection.
Handling the 5-Pin (RGBW) Connection Points
RGBW (Red, Green, Blue, White) strips include a dedicated white chip for truer illumination. This adds a fifth pad. The pads are often narrower and closer together, requiring a steady hand.
Matching Connector Width
Before you cut, verify the width of the strip (usually 10mm or 12mm) and your intended connectors. If you cut an RGBW strip but only have standard RGB connectors, the pins will not align with the pads, and your project will stall. Browse our shop to ensure you have the compatible connectors for your specific strip type.
4. Where to Cut LED Strip Lights That Are Waterproof (IP65/67)?
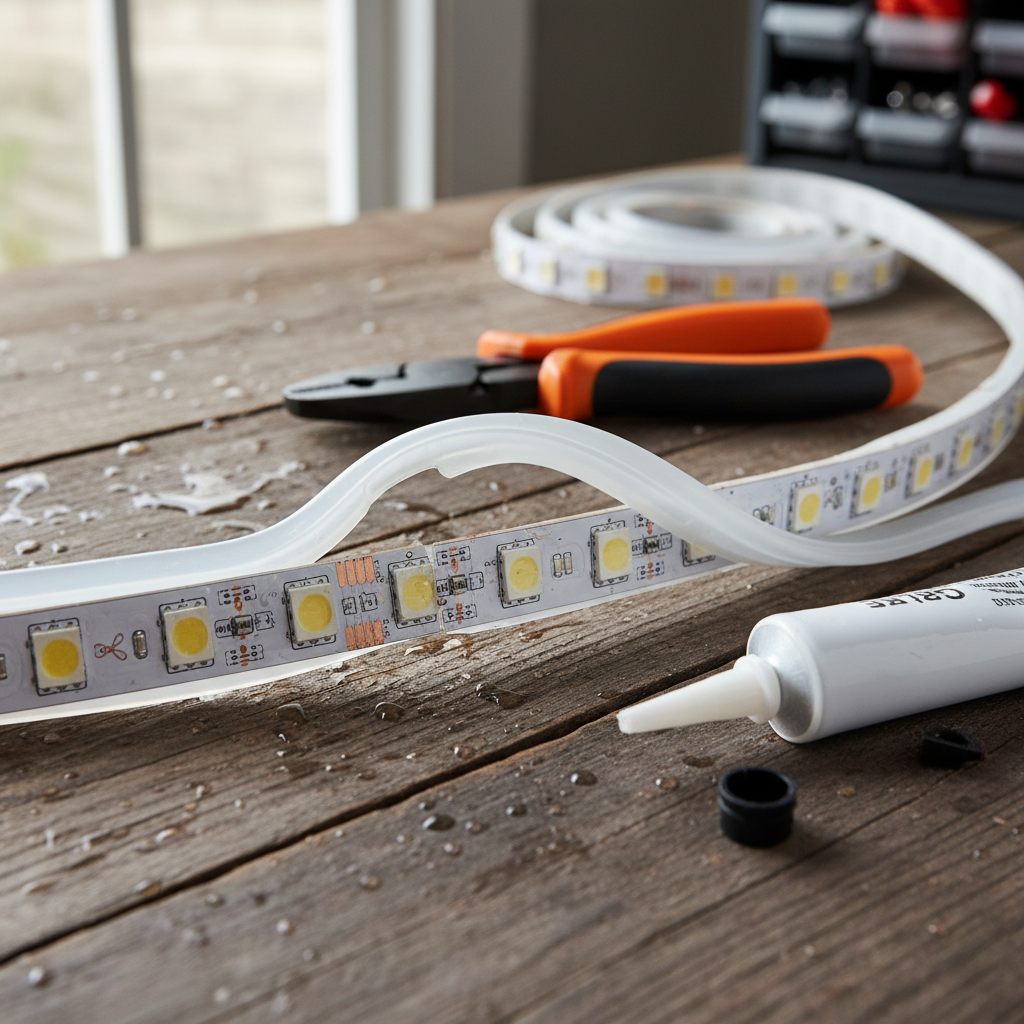
Waterproof strips are encased in silicone or epoxy to protect them from moisture, but this coating complicates the cutting process.
Removing the Silicone Coating
You cannot simply snip through a heavy-duty IP67 strip with scissors without crushing the internal PCB. First, you must identify the cut mark through the silicone. Then, carefully use a precision knife to score and peel back the silicone layer around the copper pads. This exposes the metal for a clean electrical connection later.
Cutting Through the Epoxy Layer
For thinner IP65 resin-coated strips, you can cut directly through the coating. However, be aware that the resin can shatter or crack if the scissors are dull, potentially damaging the adjacent LEDs.
Resealing the Cut Point
Once cut, the waterproof rating is compromised at that specific end. If you plan to install this in a wet environment, you must reseal the cut end with a silicone end cap and waterproof glue. Failure to do this will allow moisture to wick up inside the strip, corroding the copper pads over time.
5. Where to Cut LED Strip Lights That Have No Visible Markings?
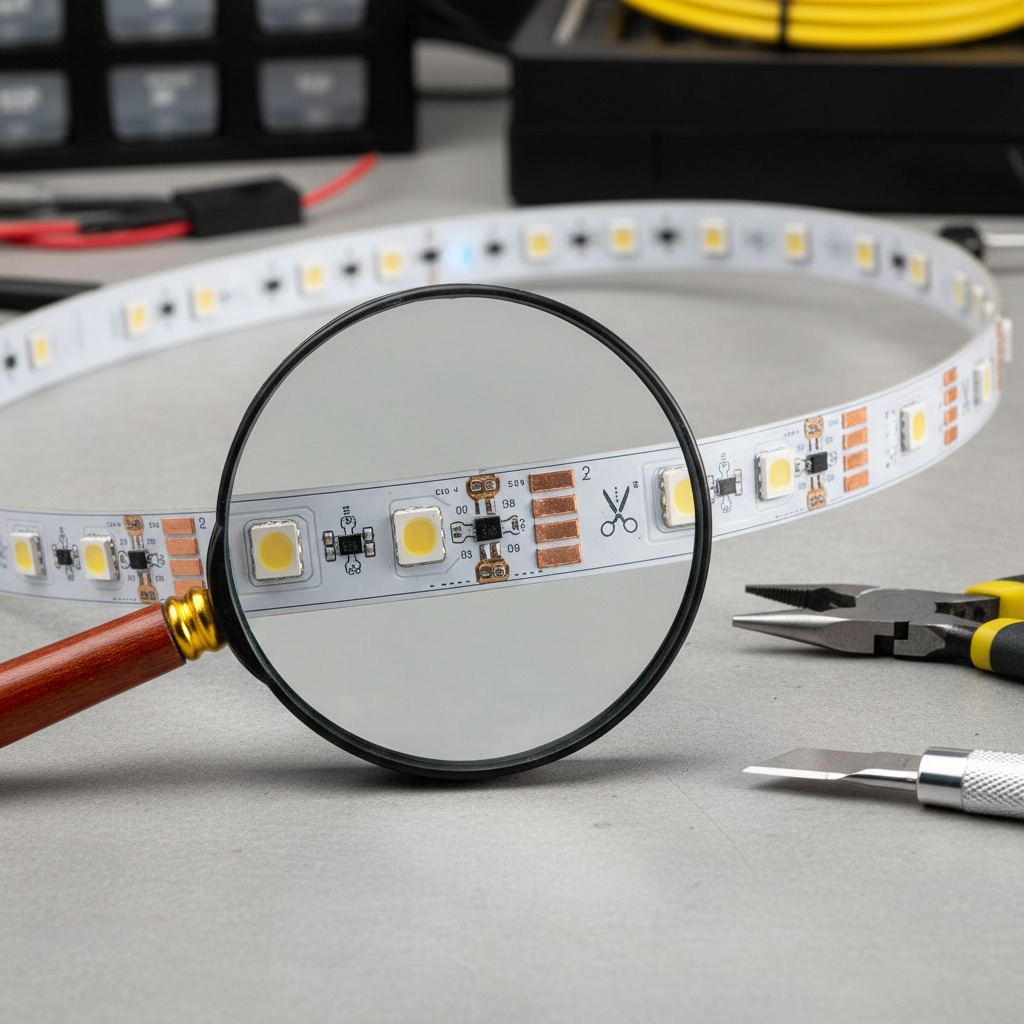
Occasionally, you may encounter a “stealth” strip or a budget model where the paint layer was misapplied, hiding the scissor icons. How do you find where to cut LED strip lights in this scenario?
Using the ‘Counting LEDs’ Method
Recall the voltage rule from Section 2. If you have a 12V strip, count three LEDs from the start. The cut point will be located in the gap immediately following the third LED. For 24V, count six LEDs.
Tracing the Resistor and Circuit Layout
Look closely at the surface of the strip. You will see faint copper traces (lines) running under the paint. At the end of a circuit loop, there is usually a physical gap in these traces or a distinct vertical line where the PCB sections are joined.
Testing with a Multimeter
If you are unsure, never guess. Use a multimeter to check for continuity. The positive and negative rails run the entire length of the strip, but the control circuit breaks at the cut points. Identifying these electrical breaks confirms the safe cutting zone.
6. Where to Cut LED Strip Lights That Are ‘Smart’ or IC-Controlled?

Smart strips (Dreamcolor, WS2812B, etc.) have integrated circuit (IC) chips that allow for chasing effects and individual pixel control.
Addressable Strip Limitations
Unlike standard analog strips, smart strips have a “Data” line (marked DO/DI for Data Out/Data In). You must be extremely careful to cut in the correct direction of the signal flow, usually indicated by small arrows on the PCB.
Identifying the Data Line vs. Power Line
Smart strips often have three pads: +5V/12V, Data, and GND. The cut point is still located on the copper pads between the pixels. However, some high-density smart strips place the cut point next to the LED rather than between distinct groups, effectively making every single LED cuttable.
Preserving Signal Direction
If you cut a smart strip and try to solder power to the “Data Out” end, the strip will not light up. You must always feed the signal into the “Data In” side. For more technical tips, check our latest blog posts .
7. Where to Cut LED Strip Lights to Reuse the Leftovers?
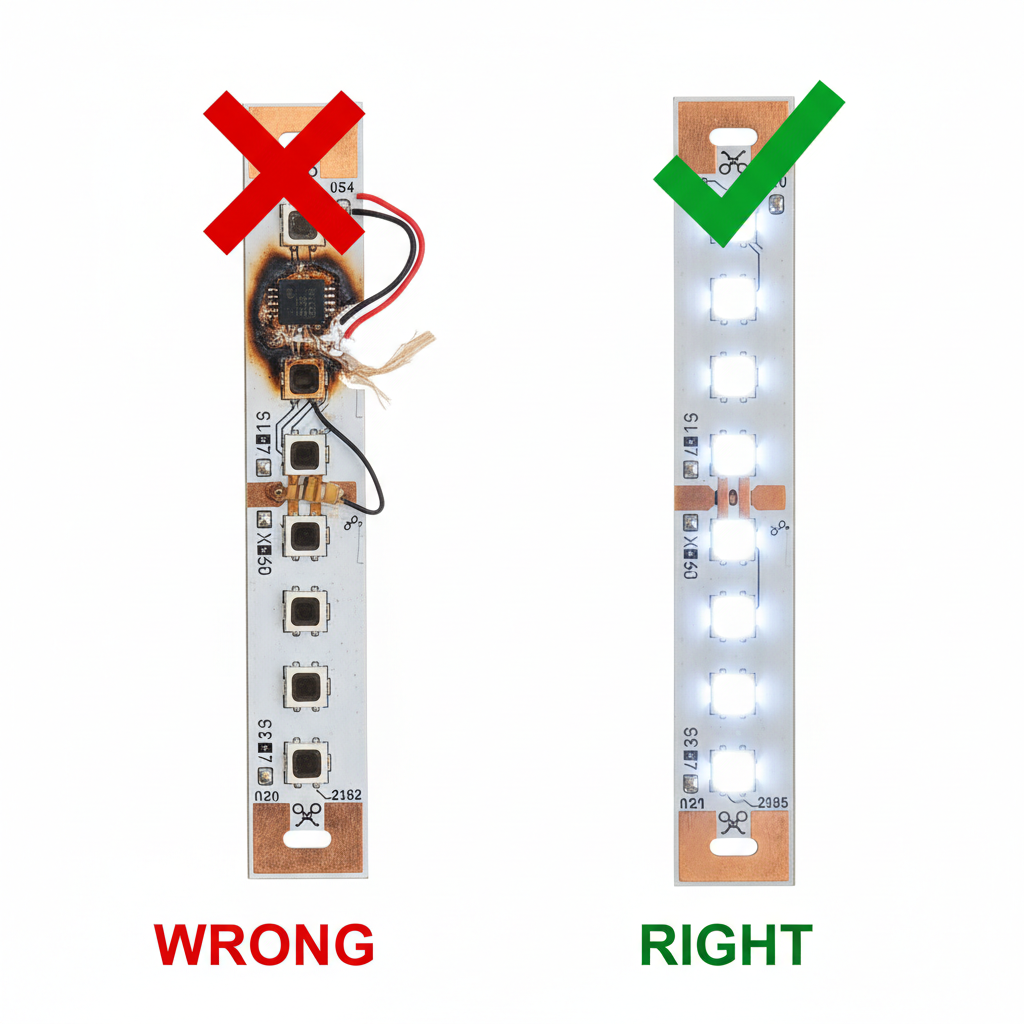
One of the biggest advantages of LED strips is modularity. The piece you cut off is not waste; it is a fully functional light strip, provided you cut it correctly.
Leaving Enough Copper Pad for Connectors
The “center cut” rule is paramount here. If you cut too close to the left, the left strip works, but the right strip (the leftover) has no copper pad remaining to attach a wire. By cutting exactly in the middle, you ensure both the installed strip and the leftover remnant have viable connection points.
Using Solderless Connectors
Clip-on connectors are the easiest way to reuse cut segments. They slide over the exposed copper pads and snap shut. However, they require a minimum amount of copper surface area to make good contact.
Soldering for a Permanent Fix
For a professional, durable connection, soldering wires directly to the pads is superior to clips. It allows you to reuse even difficult cuts where the pad might be slightly too short for a plastic clip. If you are struggling with a custom repair, feel free to contact us for advice.
8. Where to Cut LED Strip Lights for Specific Corner Installations?
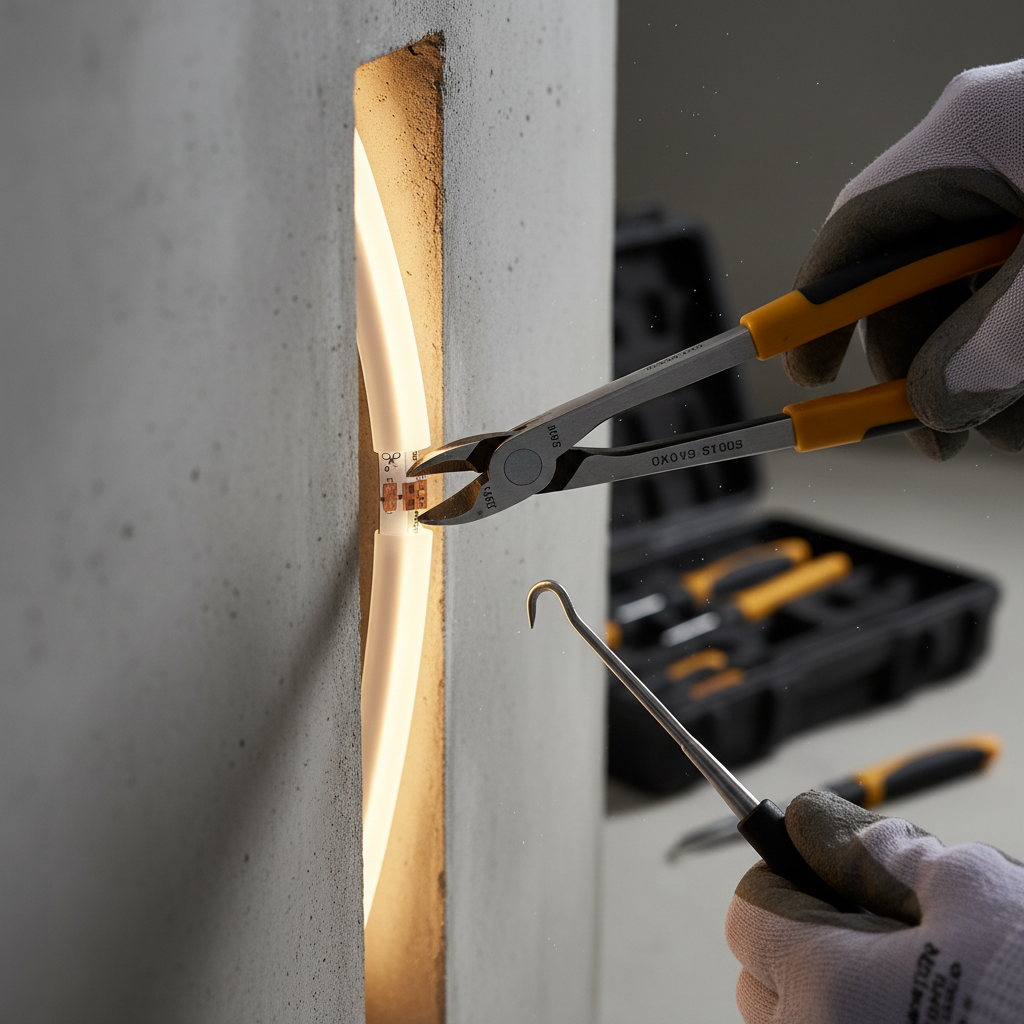
Forcing an LED strip to bend 90 degrees flat against a surface will damage the circuitry. Instead, you should cut and reconnect.
Measuring for 90-Degree Turns
Run your strip to the very edge of the corner. Mark the closest cut point before the bend. Do not try to fold the strip exactly at the corner if no cut point exists there; it is better to stop short and use a flexible wire to jump the gap.
Cutting for Gap Jumps (Kitchen Cabinets)
When jumping from one cabinet to another over a stove or sink, cut the strip at the last safe point on the first cabinet. Solder a length of low-voltage extension wire to reach the next cabinet, and then connect the next segment of the strip.
Using Corner Connectors
L-shaped connectors are available that snap two cut strips together at a 90-degree angle. These require clean cuts on both strips to function properly.
9. Where to Cut LED Strip Lights If I Made a Mistake?
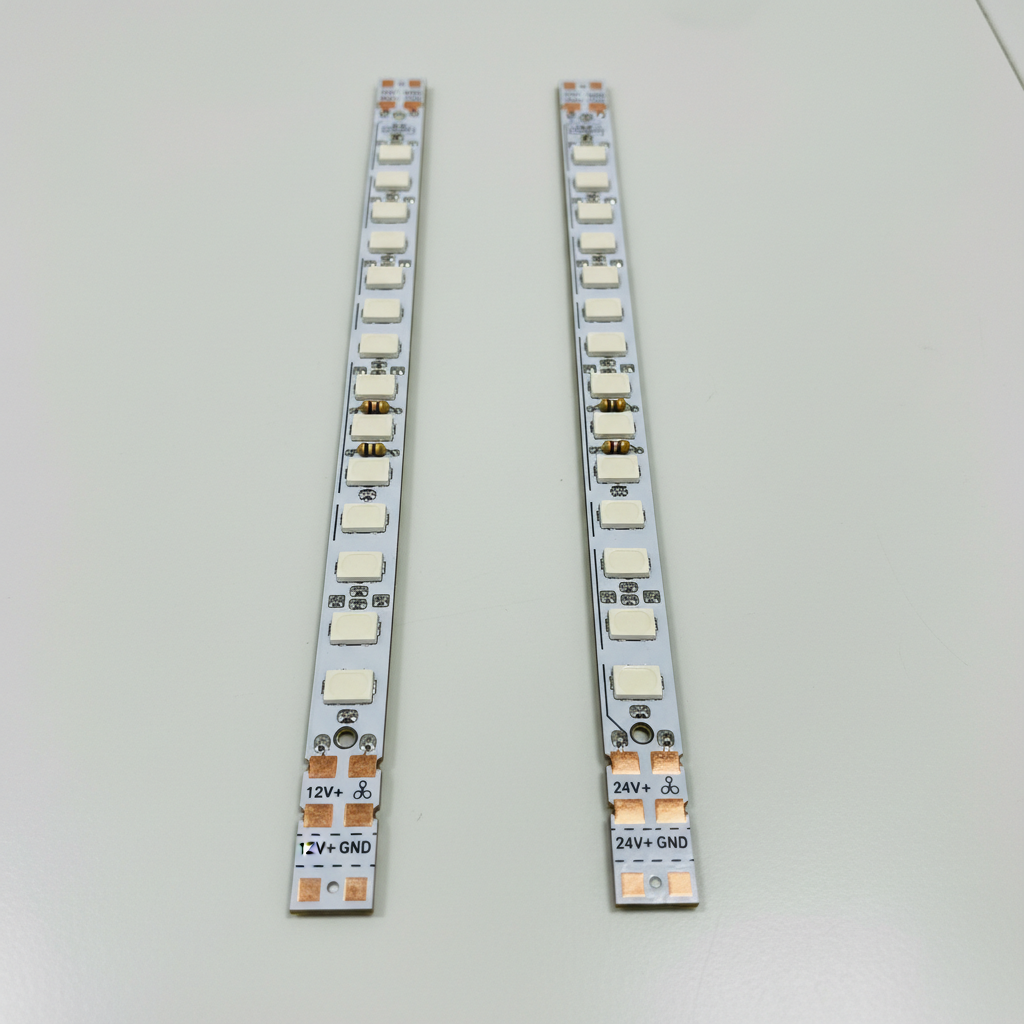
It happens to the best of us. You miscalculated and snipped through a diode or missed the copper pads entirely.
Assessing Damage to the Copper Pad
If you cut off the copper pad, that specific end of the strip typically cannot be connected via solderless clips. However, if you are skilled with a soldering iron, you might be able to carefully scrape back the PCB mask to expose the trace, though this is advanced.
Cutting Back to the Previous Segment
The safest solution is to sacrifice one circuit loop. Move back to the previous cut mark (3 or 6 LEDs back) and make a fresh, clean cut on the pads. You will lose a few inches of light, but you will regain a reliable connection point.
Repairing a Broken Circuit
If you accidentally cut a trace in the middle of a segment, you can sometimes bridge the gap with a small piece of wire and solder, acting as a “jumper” to bypass the break.
10. Where to Cut LED Strip Lights Using the Correct Tools?
Knowing where to cut LED strip lights is useless if you use a tool that crushes the board rather than slicing it.
Why Scissors are Better Than Utility Knives
While utility knives are sharp, the pressure required to cut through the PCB can cause the knife to slip or crush the delicate copper layers. A pair of sharp, high-quality electrician’s scissors or shears applies equal pressure from both sides, resulting in a clean shear.
Preventing Short Circuits During the Cut
Never use wire strippers that are designed for thick cables, as they can mangle the edge of the strip. Ensure your scissors are not magnetized if you are working near sensitive electronics, although for standard strips, this is rarely an issue.
Safety Gear: Disconnecting Power First
It cannot be stressed enough: Disconnect the power supply before cutting. Cutting a live strip can short the positive and negative pads together through the metal blades of your scissors, creating a spark that can ruin the strip’s controller or power supply.
Conclusion
Customizing LED lighting is a straightforward process that elevates a project from “DIY” to “Professional,” provided you follow the golden rule of the circuit. Always identify the designated copper pads, respect the voltage intervals, and use the sharpest tools available. Whether you are dealing with complex addressable RGBW strips or standard 12V white lighting, the cut point is your gateway to a perfectly tailored installation.

Frequently Asked Questions (FAQs)
- Can I cut LED strips anywhere?
- No. You must only cut at the specific copper pads or “scissor” marked intervals to avoid breaking the circuit.
- What happens if I cut an LED strip in the wrong place?
- The section of LEDs between the cut and the previous valid cut mark will stop working, but the rest of the strip will usually function.
- Do I need special tools to cut LED strip lights?
- No, a standard pair of sharp household scissors is usually the best tool. Avoid dull blades that crush the circuit board.
- How do I connect LED strips after cutting?
- You can use clip-on solderless connectors (ensure you match the pin count and width) or solder wires directly to the copper pads.
- Can I cut waterproof LED strips?
- Yes, but you must peel back the silicone coating at the cut point and reseal it with a waterproof end cap and glue if it will be used outdoors.