
Wiring LED strip lights involves connecting the electrical contacts of the light tape to a compatible DC power supply using high-quality conductors. Many contractors face significant hurdles when flickering or inconsistent brightness ruins a high-end commercial installation.
These failures agitate clients and lead to expensive on-site repairs that diminish your project’s profitability. Fortunately, mastering the professional techniques for wiring LED strip lights provides the reliable solution you need for every architectural application.
What equipment do you need for wiring LED strip lights safely?
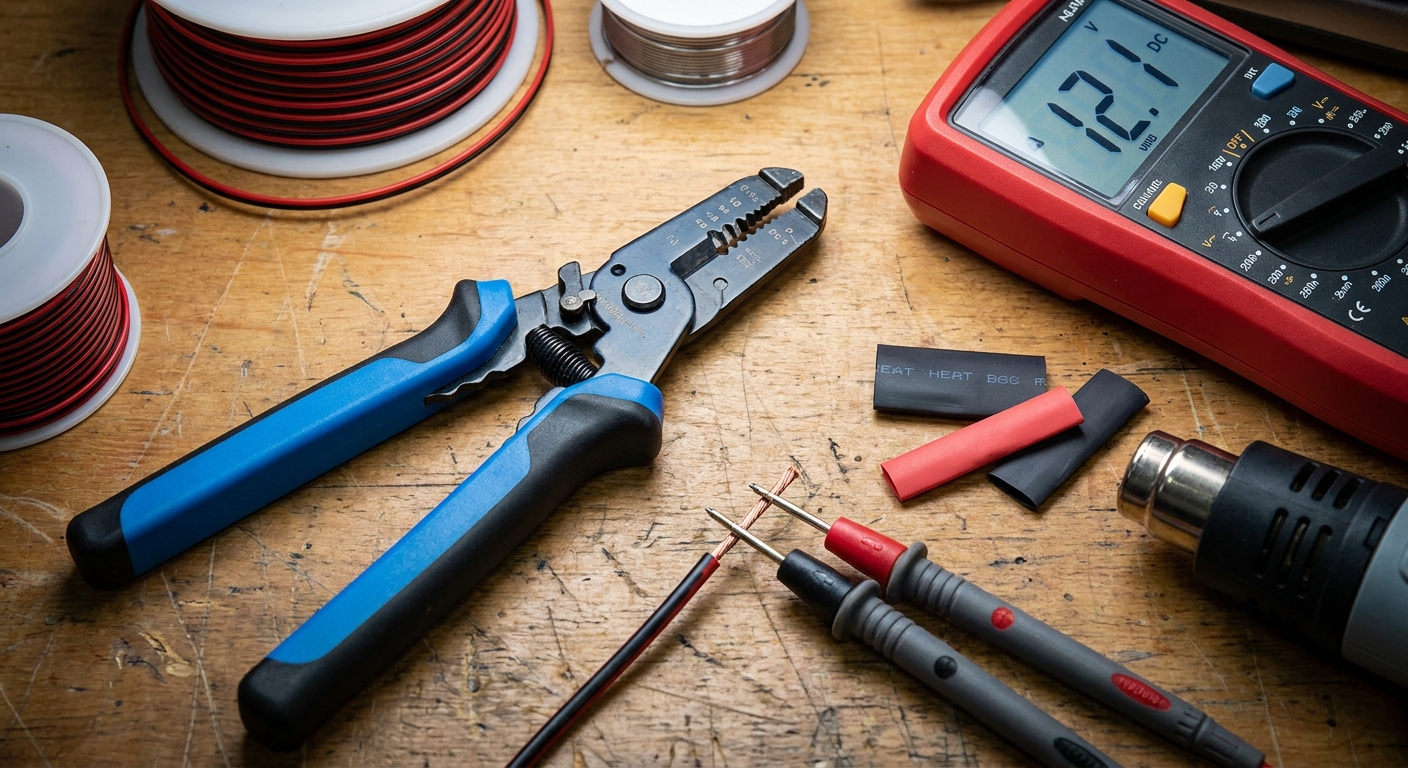
Safe wiring LED strip lights requires a precision toolkit including wire strippers, a digital multimeter, and heat shrink tubing for insulation. You cannot achieve professional results with makeshift tools that damage fragile copper pads.
Why is a multimeter essential?
A multimeter allows you to verify that the voltage reaching the end of your run matches the input from the driver. Here is the kicker: even a small drop in voltage can lead to visible dimming or color shifting in multi-color setups.
Which tools ensure a permanent bond?
Using a temperature-controlled soldering iron ensures that your connections withstand thermal expansion over years of use. While clip-on connectors are faster, they often fail in environments subject to vibration or temperature swings.
- Wire strippers for 18-22 AWG
- Lead-free electrical solder
- Heat gun for tubing
- Precision screwdrivers
Key Takeaway
Quality tools are the foundation of any commercial-grade lighting installation, preventing intermittent contact issues.
| Tool Name | Primary Function | B2B Importance |
|---|---|---|
| Multimeter | Circuit Verification | Error Prevention |
| Heat Shrink | Wire Insulation | Long-term Safety |
| Wire Strippers | Conductor Prep | Speed & Accuracy |
Professional equipment reduces the margin for error during complex site deployments.
How do you plan the layout before wiring LED strip lights?
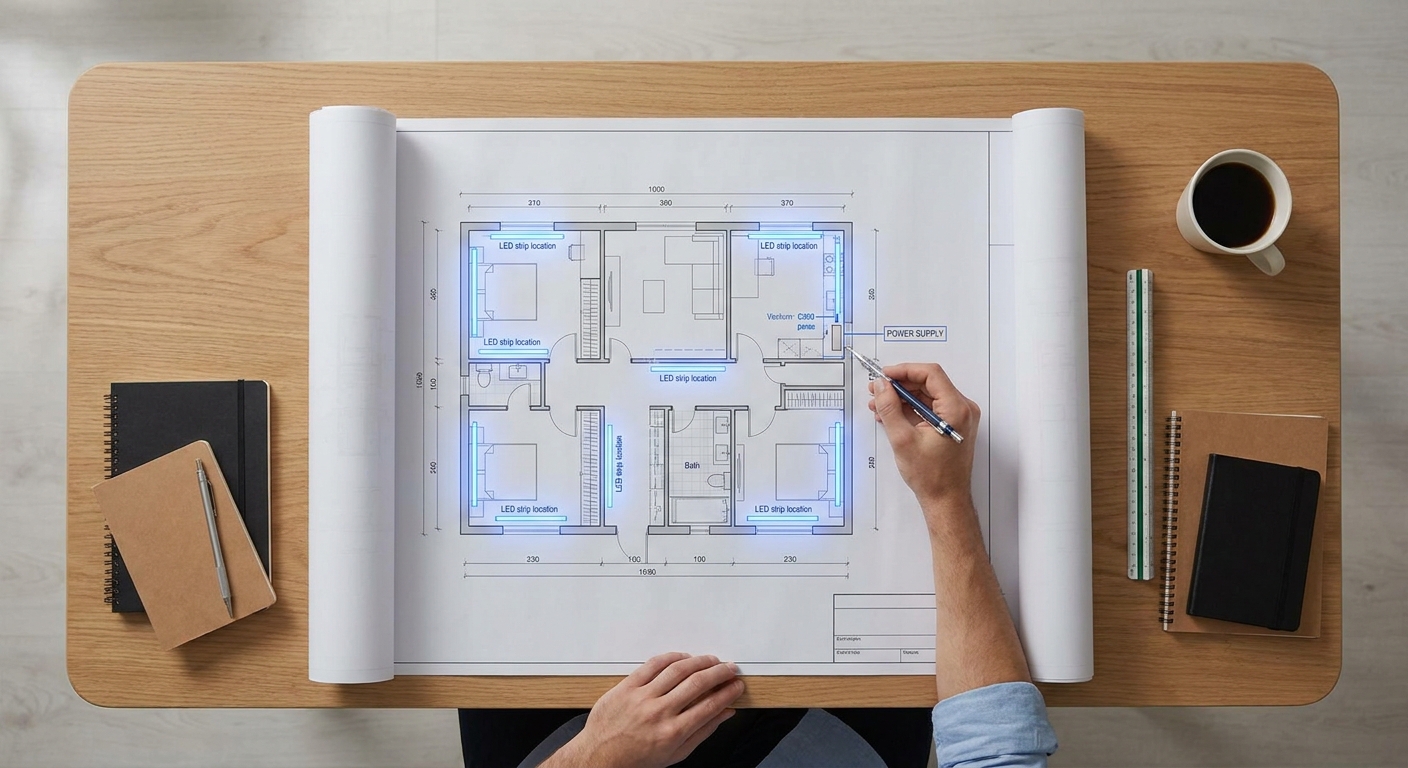
Planning your layout involves measuring the exact linear footage of the installation area and identifying the optimal location for the power driver. Proper preparation prevents the need for messy rewiring LED strip lights mid-project.
Can you map the power path effectively?
Mapping the path requires you to locate a ventilated area for the transformer that remains accessible for future maintenance. You might be wondering if the distance from the driver to the first light matters. It absolutely does, as excessive lead wire increases resistance.
How do you calculate wattage requirements?
You must sum the total wattage per foot of the strip and add a 20% safety buffer to your power supply capacity. This ensures that the driver does not run at 100% capacity, which significantly extends the life of the internal components.
- Measure total run length
- Calculate total amperage
- Select 80/20 rated drivers
- Mark all cut points
Key Takeaway
Rigorous planning eliminates the risk of overloading circuits or experiencing unexpected dimming at the end of the line.
| Planning Step | Action Required | Resulting Benefit |
|---|---|---|
| Site Survey | Measure all runs | Accurate BOM |
| Load Calculation | Add 20% buffer | Driver Longevity |
| Pathing | Locate power points | Clean Aesthetics |
Strategic layouts transform a simple light installation into a cohesive architectural feature.
What are the different methods for wiring LED strip lights?
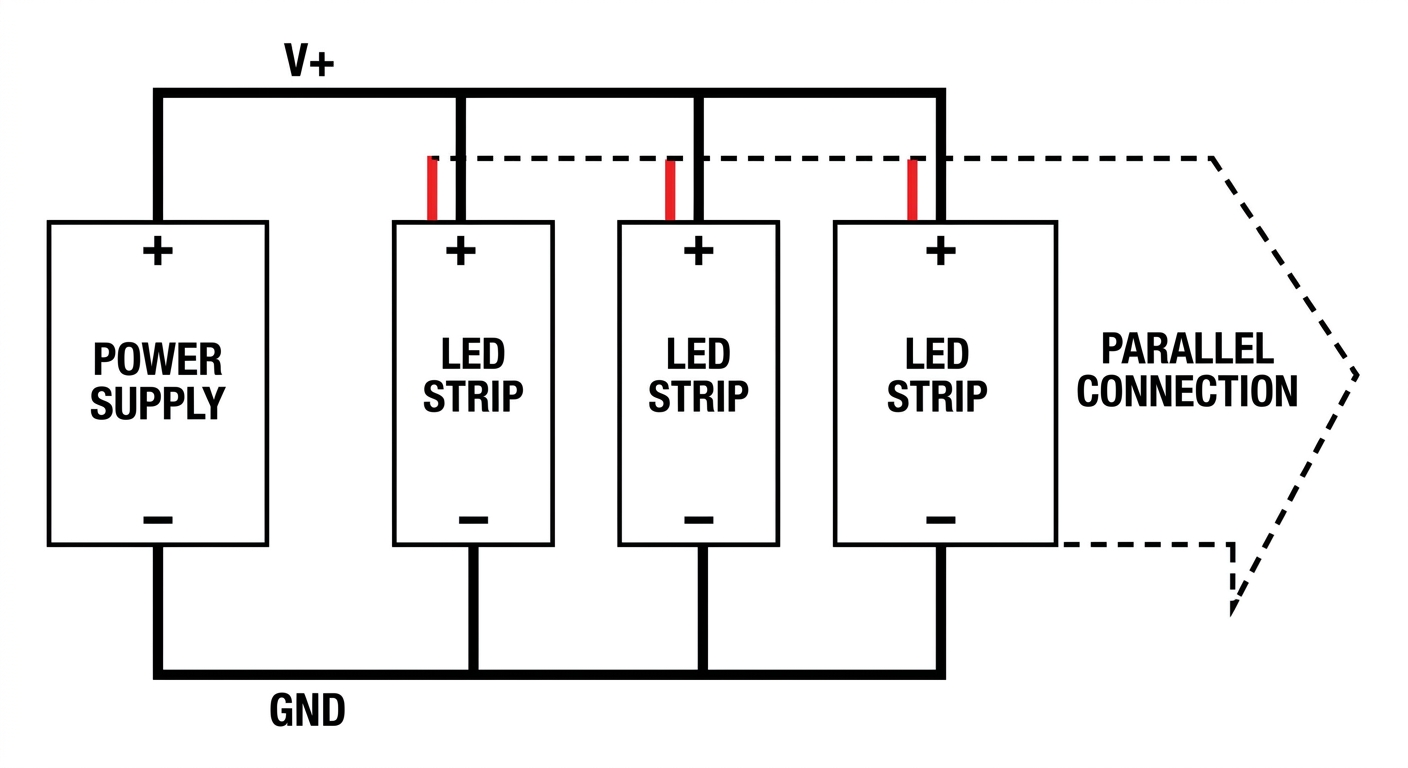
The primary methods for wiring LED strip lights include daisy-chaining for short distances and parallel wiring for long-distance uniformity. Choosing the wrong method for a large-scale project will result in uneven light distribution.
When should you use parallel wiring?
Parallel wiring is the standard for commercial projects because it feeds each segment of light directly from the main power bus. Want to know a secret? This method ensures that every strip receives the same voltage, regardless of its position in the room.
Are solderless connectors reliable?
Solderless connectors provide a quick, tool-free way to join segments, making them ideal for rapid prototyping or dry indoor environments. However, you must ensure the connector pins align perfectly with the copper pads to avoid arcing.
- Parallel bus bars
- Daisy-chain series
- Solderless terminals
- Hardwired solder joints
Key Takeaway
Parallel wiring is the superior choice for professionals demanding uniform brightness across extensive architectural installations.
| Wiring Method | Best Use Case | Reliability Rating |
|---|---|---|
| Parallel | Large Commercial | Highest |
| Series | Small Displays | Medium |
| Connectorized | DIY/Temporary | Standard |
Selecting the appropriate connection architecture prevents the “fading” effect common in amateur setups.
How do you handle corners when wiring LED strip lights?
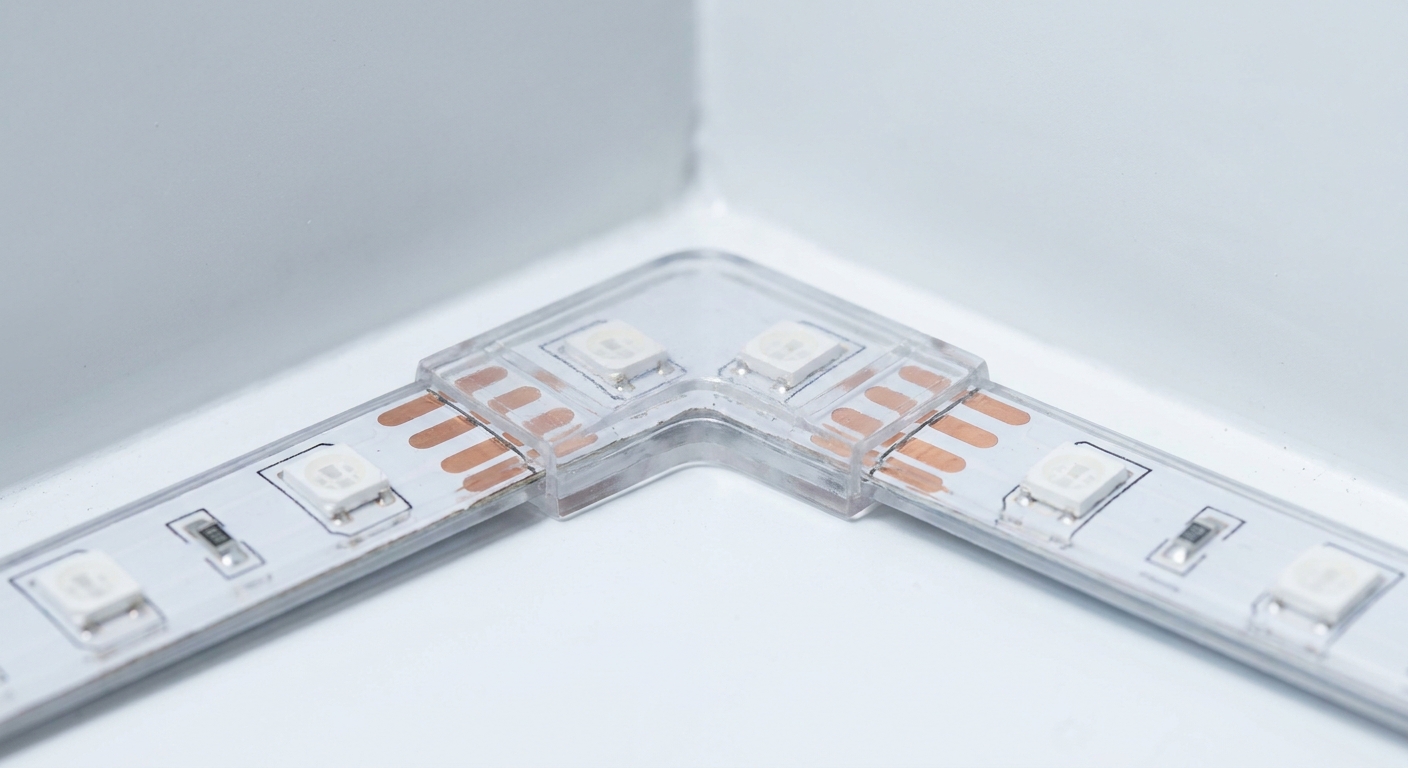
Handling corners correctly involves using flexible wire jumpers or dedicated L-shape connectors to bridge the gap without bending the light strip. Forcing a strip into a 90-degree angle while wiring LED strip lights can snap the internal circuitry.
What is the “ribbon fold” technique?
The ribbon fold technique allows you to create a corner by folding the strip back on itself at a 45-degree angle. You might be wondering if this damages the LEDs. If done carefully without putting pressure on the diodes, it maintains electrical continuity perfectly.
Why use jumper wires for gaps?
Jumper wires allow you to navigate around obstacles like cabinet supports or wall studs where light is not required. This saves on material costs and ensures your wiring remains hidden from the end-user’s view.
- L-shape rigid joints
- Flexible wire jumpers
- 45-degree ribbon folds
- Extension lead bridges
Key Takeaway
Using jumpers for corners maintains the integrity of the strip while allowing for complex geometric lighting designs.
| Corner Solution | Complexity | Visual Finish |
|---|---|---|
| Wire Jumper | Moderate | Seamless |
| L-Connector | Low | Discrete |
| Ribbon Fold | High | Tight |
Mechanical stress is the leading cause of premature failure in corner-intensive lighting designs.
Why is polarity critical when wiring LED strip lights?
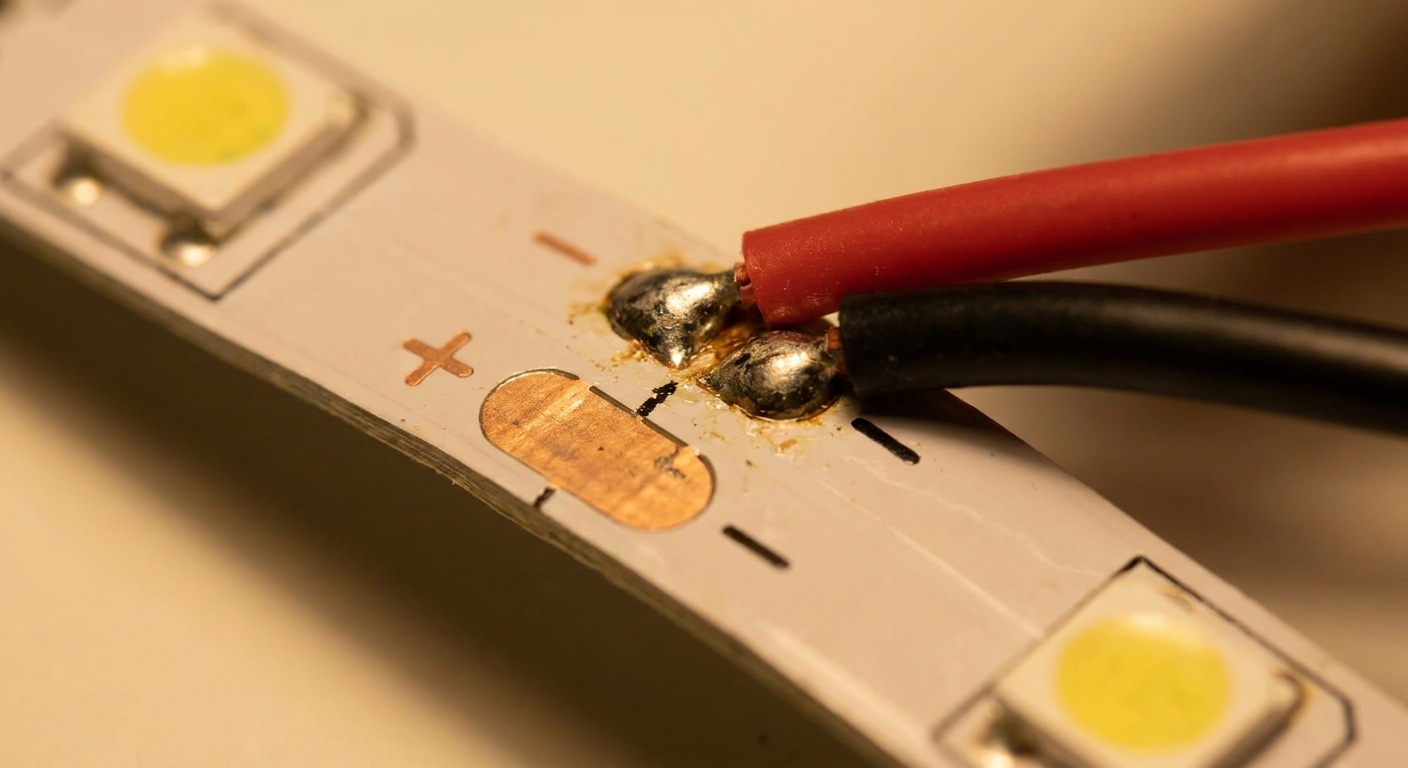
Polarity is critical because LEDs are diodes that only allow electricity to flow in one specific direction. Incorrectly wiring LED strip lights by reversing the positive and negative leads will prevent the entire system from illuminating.
How do you identify positive and negative leads?
Most strips utilize clearly marked “+” and “-” symbols on the copper pads, often with red wires signifying positive and black for negative. Here is the deal: mixing these up can potentially damage sensitive controllers or dimming modules.
What happens in multi-color systems?
In RGB or RGBW systems, you must align the common positive lead with the correct color-coded ground channels for Red, Green, and Blue. Failing to do so will result in the wrong colors appearing when you use your remote or DMX interface.
- Marked copper pads
- Color-coded insulation
- Keyed connectors
- Circuit diagram check
Key Takeaway
Double-checking polarity before applying power is a non-negotiable step that protects your hardware investment.
| Signal Type | Standard Color | Function |
|---|---|---|
| Positive (+) | Red | Power Feed |
| Negative (-) | Black | Ground Return |
| RGB Common | White | Universal Anode |
Consistent color coding across a project prevents confusion during the final assembly and commissioning.
How do you manage power injection when wiring LED strip lights?
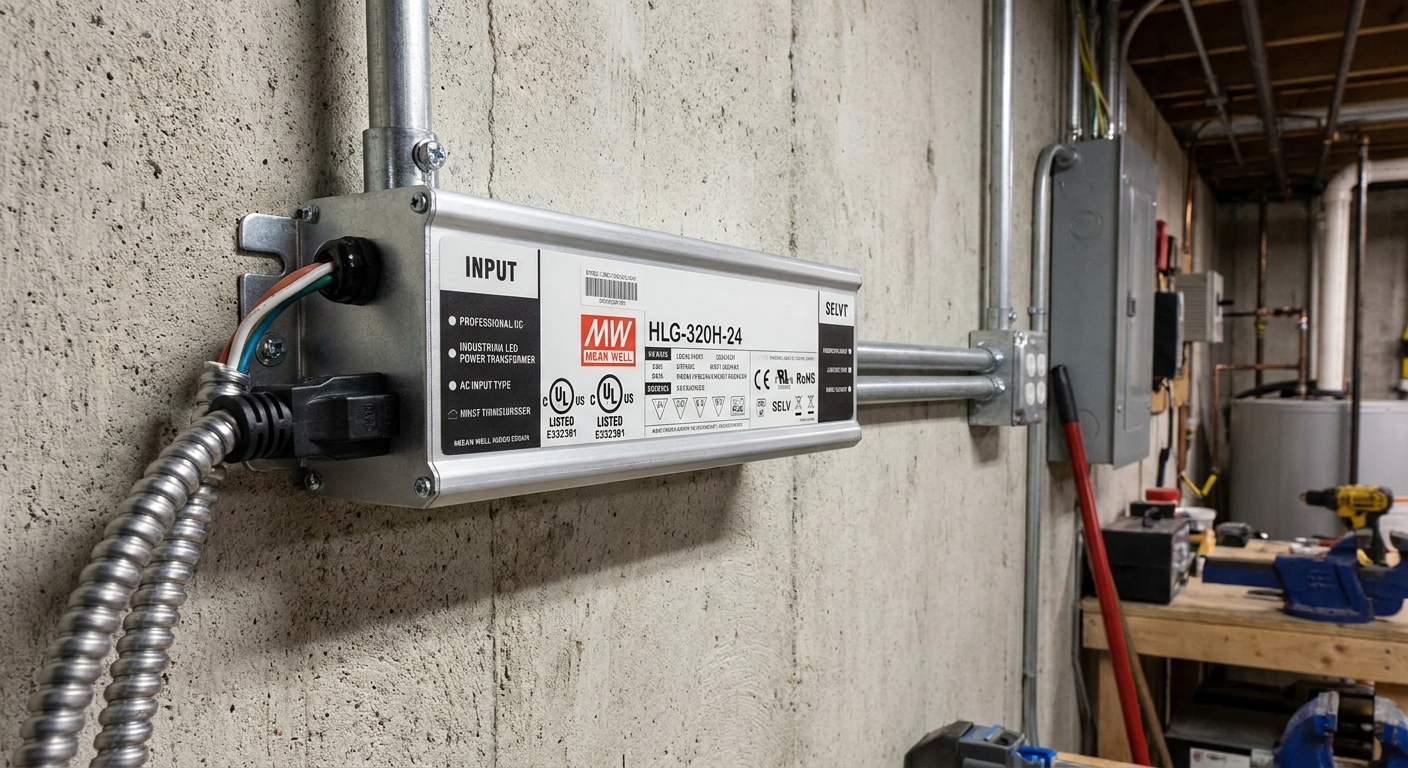
Power injection involves adding supplemental power feeds at various points along a long run to counteract the natural resistance of the copper traces. Without injection, wiring LED strip lights over distances exceeding 16 feet often results in dimming.
Where should you inject power?
You should inject power at both ends of a run or every 10 to 15 feet to maintain a consistent 12V or 24V signal. Think about it: the further electricity travels through thin copper, the more energy is lost as heat.
Does wire gauge affect injection?
Using a thicker gauge wire for your main power bus minimizes the voltage drop before it even reaches the injection points. This is especially vital in 24V systems where high-wattage strips demand significant current over long architectural spans.
- Dual-end power feeds
- Mid-run T-junctions
- Heavy-gauge bus lines
- Dedicated signal boosters
Key Takeaway
Power injection is the only way to achieve uniform brightness on runs that exceed the strip’s native voltage limit.
| Run Length | Injection Needed? | Recommended Feed |
|---|---|---|
| < 16 ft | No | Single End |
| 16 – 32 ft | Yes | Double End |
| > 32 ft | Mandatory | Multiple Points |
Voltage drop is a physical law that must be managed through engineering rather than hope.
What safety precautions are mandatory for wiring LED strip lights?
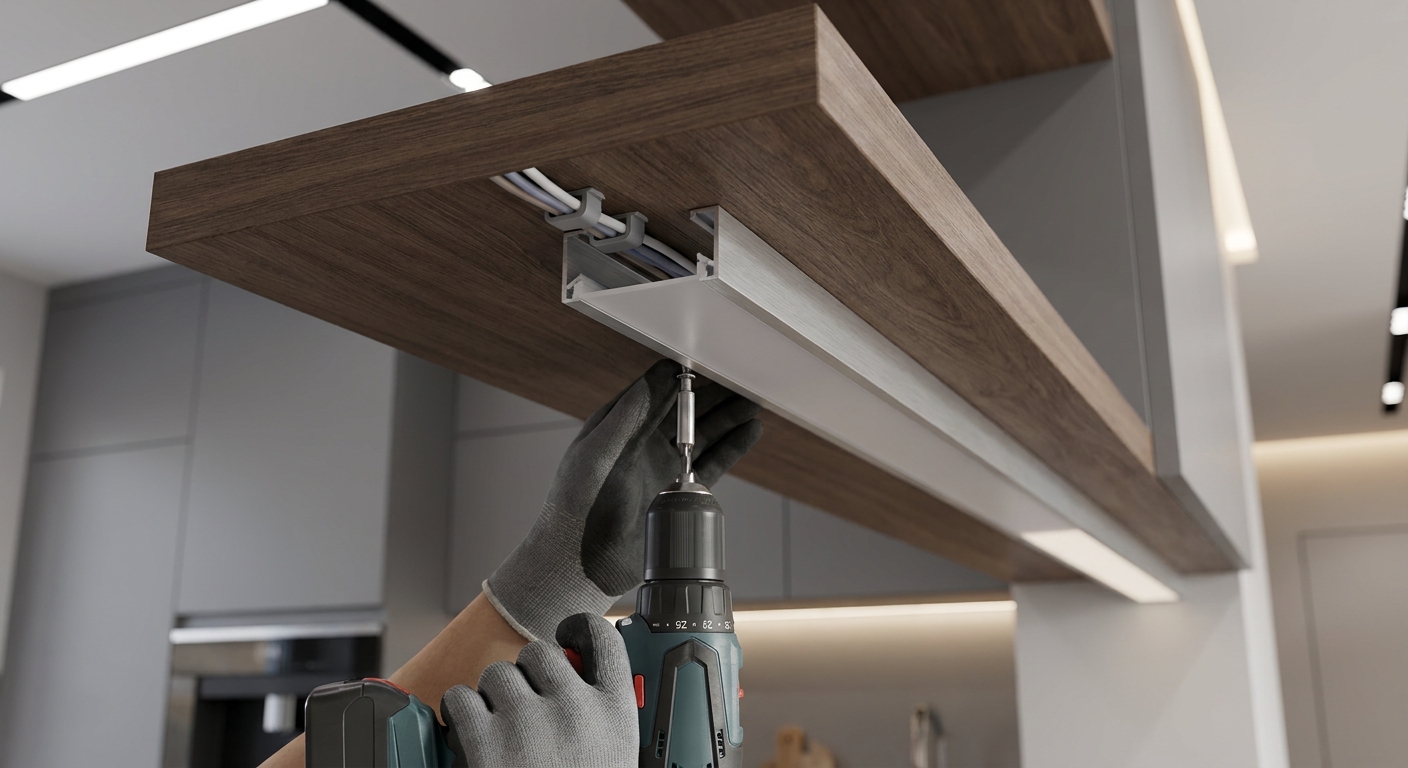
Mandatory safety precautions include using UL-listed power supplies and ensuring all wiring LED strip lights is housed in flame-retardant aluminum channels. Overlooking these standards can lead to fire hazards or electrical shorts in high-traffic commercial zones.
Why is thermal management necessary?
LEDs generate heat that must be dissipated to prevent the adhesive from failing and the diodes from burning out prematurely. You might be wondering if plastic mounting is sufficient. In B2B applications, aluminum profiles are required to act as a heat sink.
How do you protect against moisture?
In outdoor or kitchen installations, you must use IP65 or IP67 rated strips and seal all wired connections with silicone-filled end caps. Water ingress is the primary cause of corrosion in low-voltage lighting systems.
- UL-listed drivers
- Aluminum heat sinks
- IP-rated enclosures
- Grommeted wire entries
Key Takeaway
A “safety-first” approach involving proper heat dissipation and listed components ensures your installation meets local building codes.
| Safety Factor | Required Component | Primary Risk |
|---|---|---|
| Heat Load | Aluminum Channel | Fire Hazard |
| Moisture | Waterproof Sealant | Corrosion |
| Certification | UL-Listed Driver | Liability Issue |
Adhering to strict safety protocols protects both the physical property and your professional reputation.
How do you hide cables after wiring LED strip lights?

Hiding cables involves routing wires through cabinetry, behind drywall, or inside dedicated aluminum raceways to ensure a clean, finished appearance. Visible wires after wiring LED strip lights distract from the premium look of the lighting.
Can you use channels to conceal wires?
Aluminum channels not only diffuse the light but also provide a hollow space behind the strip to tuck away excess lead wires. Here is the truth: a professional installation should never have loose or sagging cables visible to the client.
How do you route through furniture?
Routing through furniture requires drilling small pilot holes in discrete corners and using cable clips to manage the slack. This ensures that the wiring remains protected from being snagged or damaged during the daily use of the space.
- Aluminum profiles
- Adhesive cable clips
- Drilled cable ports
- Crown molding hides
Key Takeaway
Concealing wires is the difference between a “DIY” project and a high-end professional lighting commission.
| Concealment Method | Visibility | Protection Level |
|---|---|---|
| In-Wall Routing | Invisible | High |
| Surface Channel | Minimal | Moderate |
| Wire Loom | Visible | Maximum |
The aesthetic success of a lighting project relies heavily on the “invisible” infrastructure of the wiring.
What common mistakes occur when wiring LED strip lights?
Common mistakes include cutting the tape outside of designated marks and failing to calculate the proper wire gauge for wiring LED strip lights. These errors lead to dead zones on the strip or overheating wires that pose a safety risk.
Why do cut marks matter?
LED strips are designed with specific internal circuit segments, and cutting anywhere else will break the electrical path for the entire section. You might be wondering why some sections stay dark. Usually, it is because the cut was made through a resistor rather than the copper pad.
Is thin wire a problem?
Using a wire gauge that is too thin for the current load causes the wire itself to heat up, wasting energy and potentially melting insulation. This “bottleneck” effect is a frequent oversight in large installations with high-amperage 12V strips.
- Wrong cut locations
- Undersized wire gauge
- Loose solder joints
- Overloaded drivers
Key Takeaway
Avoiding standard pitfalls like improper cutting and undersized wiring prevents the most frequent causes of project failure.
| Common Mistake | Immediate Result | Long-term Impact |
|---|---|---|
| Off-mark Cutting | Dead LED section | Wasted Material |
| Under-gauged Wire | Dimming/Heat | Fire Hazard |
| Bad Polarity | No Light | Component Damage |
Precision in the initial setup saves hours of frustration during the troubleshooting phase.
How do you test connections after wiring LED strip lights?
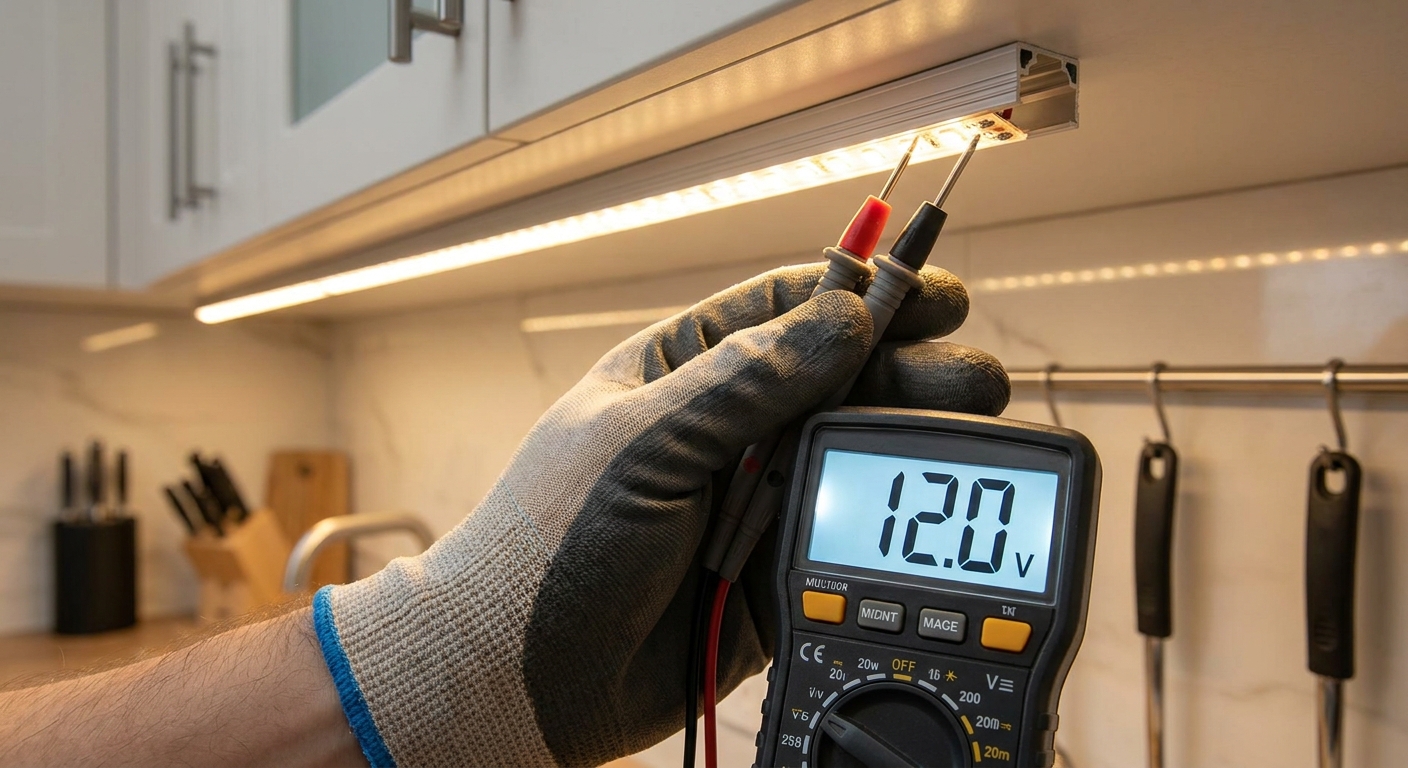
Testing connections involves using a multimeter to check for continuity and ensuring the voltage remains stable throughout the entire run. You must perform these tests before the final mounting phase of wiring LED strip lights to catch errors early.
How do you perform a stress test?
A stress test involves running the lights at full brightness for several hours to check for heat buildup at connection points. Have you ever noticed a joint getting hot? This indicates high resistance, which requires you to resolder the connection immediately.
Why verify voltage at the end?
Verifying voltage at the end of the run confirms that your power injection strategy is working and that there is no significant voltage drop. If the reading is more than 10% lower than the input, you need to add another power feed.
- Continuity check
- Voltage drop test
- Heat signature check
- Flicker observation
Key Takeaway
Systematic testing ensures that the lighting system is stable and ready for years of continuous commercial operation.
| Test Parameter | Target Value | Tool Used |
|---|---|---|
| Input Voltage | 12V or 24V | Multimeter |
| Joint Temp | < 50°C | IR Thermometer |
| Continuity | 0 Ohms | Ohmmeter |
Final validation is the hallmark of a professional who stands behind the quality of their electrical work.
Conclusion
Mastering the intricacies of LED wiring is the key to delivering high-performance lighting solutions that stand the test of time. This guide has solved your challenges regarding voltage drop, safety protocols, and professional concealment techniques.
At Darkless LED, we are committed to empowering your business with the expertise and high-quality components needed for success. To ensure your next architectural project shines with absolute precision, contact us today for expert guidance and bulk supply.
FAQ
Can I mix different voltages on the same circuit?
No. Mixing 12V and 24V components will immediately destroy the lower-voltage devices or prevent the higher-voltage ones from functioning.
What’s the best wire for long-distance runs?
Stranded copper 18 AWG or 16 AWG. Thicker wire reduces resistance and voltage drop over significant distances.
Can I wire LED strips in a single series longer than 32 feet?
No. Standard strips experience significant voltage drop after 16-32 feet, necessitating parallel wiring or mid-run power injection.
What’s the best way to prevent flickering?
Ensure all connections are soldered and use a high-quality, regulated power supply that is not overloaded.
Can I wire LED strips directly to a wall outlet?
No. You must use a DC transformer to convert 110V/220V AC power down to the 12V or 24V DC required by the strip.